

That check engine light. A quote for a service that sounds simple. The feeling that your car knows more than you do. Most drivers hit that wall at some point, especially when life is busy and the vehicle still has to get you to work, school pickup, practice, and back home again.
The good news is that some of the most useful maintenance tasks are doable in your driveway with a few tools, a little patience, and the right limits. Learning a handful of simple car repairs can save money, help you catch problems earlier, and make you more confident when a shop does need to step in. It also helps you understand the difference between a routine issue and one that can become expensive.
That matters right now. Basic maintenance visits like oil changes, filter replacements, and minor inspections typically involve a significant cost, and 64% of drivers say they are putting off some type of vehicle maintenance, according to ConsumerAffairs car repair statistics. Delays usually start small, then become bigger repairs.
If you like knowing what is under the hood, this guide is for you. If you do not, it is for you. These are practical, approachable jobs that many Richland Hills drivers can handle at home, plus the warning signs that tell you when to stop and let a pro take over. If you are also comparing replacement parts, this guide to OEM and aftermarket car parts is a useful companion read.
1. Oil and Filter Change
An oil change is one of the best simple car repairs to learn because it teaches you a lot about your vehicle in one job. You see the condition of the old oil, you inspect the drain plug area, and you get familiar with what “normal” looks like under your own car.

Start with the basics. Let the engine warm slightly so the oil flows easier, but do not work on it hot. Raise the vehicle safely, remove the drain plug, let the oil drain completely into a pan, replace the filter, then refill with the exact oil type and amount your owner’s manual calls for.
A lot of people make the same mistakes on this job. They overtighten the drain plug. They forget the old filter gasket. They guess at the oil spec. Those three mistakes can turn a clean, cheap maintenance job into a leak or a major engine problem.
DIY vs pro
DIY makes sense when:
- You know the correct oil spec: Modern engines can be picky about viscosity and manufacturer approvals.
- You can lift the vehicle safely: Ramps or stands matter more than speed.
- You want a maintenance baseline: Fresh oil and a dated record help you track future issues.
Professional service makes more sense when the filter is hard to reach, the splash shield is a pain, or the drain plug looks worn. Some vehicles turn a “simple” oil change into an access job.
If you are not sure whether your car is overdue, these signs your car needs an oil change can help you decide before the engine starts complaining.
Tip: Always check the dipstick after refilling, then start the engine, wait a moment, shut it off, and recheck. A dry start or overfill is avoidable.
For a visual walk-through, this quick demonstration helps:
Stop the DIY attempt if you see metallic glitter in the oil, a stripped drain plug, or oil leaking immediately after restart. That is no longer routine maintenance. That is inspection time.
2. Air Filter Replacement
If you want a fast win, replace the engine air filter. On many vehicles, it is a clips-and-cover job that takes only a few minutes.
Open the air box, lift out the old filter, wipe out loose debris if needed, and install the new one in the same orientation. Make sure the housing seals fully when you close it. A filter installed crooked can let dirt bypass the element and head straight into the intake.
What works and what does not
What works:
- Checking the old filter in daylight: A dark, packed element tells you a lot.
- Inspecting the air box seal: Cracked clips or warped plastic can matter as much as the filter.
- Replacing the cabin filter at the same time: If your HVAC airflow feels weak or stale, this is often the missed maintenance item.
What does not work:
- Blasting the filter with compressed air and calling it new again
- Driving with the filter removed “just for a quick test”
- Buying by visual match alone instead of by exact application
This is one of those simple car repairs where a careful driver often does as well as a rushed technician. The trick is paying attention to fitment.
DIY vs pro
Do it yourself if the housing is easy to open and everything looks intact.
Call a pro if you notice oil in the air box, a torn intake tube, broken clips, rodent nesting material, or signs that unfiltered air has been getting past the seal. That moves the job from filter replacement into intake diagnosis. On some newer cars, poor performance after a filter change can also point to a sensor issue, not the filter itself.
A clean filter helps, but it will not cure every drivability complaint. If the engine still idles rough or hesitates after replacement, do not keep guessing.
3. Battery Terminal Cleaning
You turn the key, the dash lights up, and the engine drags like the battery is dying. Then you pop the hood and see that chalky buildup around the terminals. I see this a lot. Corrosion can block current flow enough to cause slow cranking, flickering accessories, and intermittent no-starts.
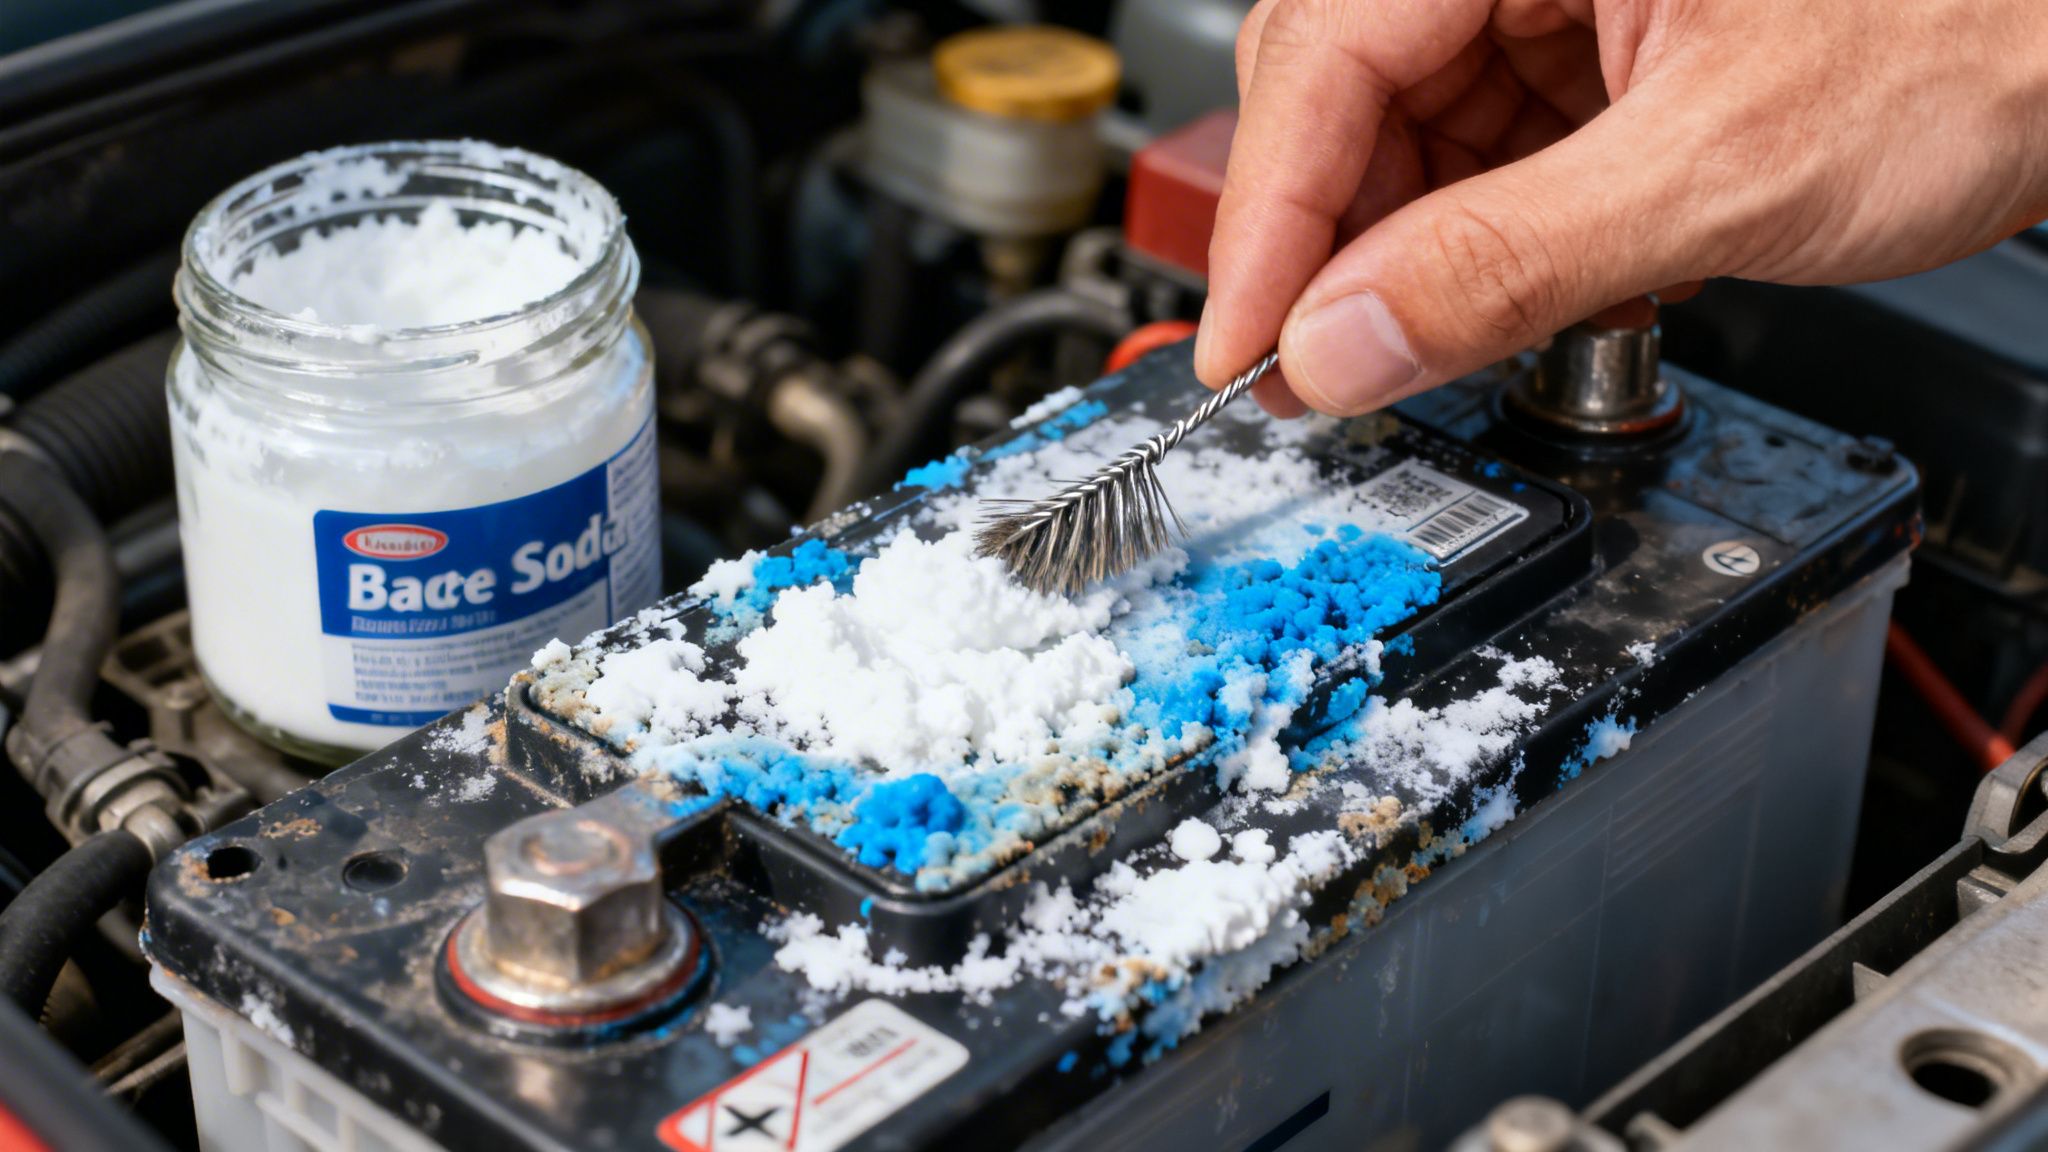
For a basic cleanup, disconnect the negative cable first, then the positive. Clean the battery posts and the inside of the cable ends with a battery terminal brush or a light baking soda and water paste. Rinse carefully if needed, dry the area fully, then reconnect positive first and negative last. Finish with dielectric grease or terminal protectant spray.
Wear eye protection and gloves. Battery acid is no joke.
What a simple cleaning can fix
Battery terminal cleaning is a good DIY job when the problem is visible and limited to the connections. It often solves:
- White, blue, or green corrosion on the posts
- A loose cable end that will not clamp tightly until the contact surfaces are cleaned
- Occasional slow cranking with no other warning signs
- Brief power loss to lights or accessories caused by poor terminal contact
If the battery is secured properly, the cables are intact, and the car starts normally after cleaning, you likely handled the issue.
DIY vs. pro
Handle it yourself if corrosion is light, the terminals tighten correctly, and the battery case looks normal.
Call a pro if corrosion returns quickly, the battery case is swollen or leaking, the hold-down bracket is loose, the cable ends are damaged, or the vehicle still needs jump-starts after the terminals are clean. At that point, the job has moved past a simple fix and into battery, charging system, or parasitic draw diagnosis.
If this keeps happening, these steps to prevent car battery corrosion can help, but repeated buildup still deserves a proper inspection.
4. Coolant Flush and Level Check
Coolant work is where patience matters more than confidence. Never check it with a hot engine. Ever. Pressure and hot coolant can quickly cause injury.
For a basic driveway check, inspect the overflow reservoir when the engine is fully cool. The level should sit between the marked lines. If it is low, top off with the correct coolant or distilled water in a pinch, then correct it properly soon after.
The driveway check that catches bigger problems
Look around the radiator cap area, hose connections, reservoir, and under the water pump area. White or chalky residue often means coolant has been escaping and drying there. Also pay attention to the smell. A sweet odor after parking can point to a leak even before you spot dripping.
A full flush is more involved because you need the right coolant chemistry, clean refill procedures, and careful bleeding of air from the system. Air pockets can cause overheating and erratic heater performance.
Shop advice: If you are topping off coolant more than once, stop thinking of it as a refill issue. Start treating it like a leak check.
DIY vs pro
DIY fits a simple top-off and visual inspection.
Professional help is the better move if:
- The engine runs hot
- The heater blows cold when it should be warm
- You see milky contamination
- You notice repeated coolant loss
- The vehicle needs a proper flush and air bleed
Newer vehicles can be picky here. Coolant type matters, and mixing formulas can create a bigger mess than a low reservoir did in the first place.
5. Windshield Wiper Blade Replacement
Wiper blades are easy to ignore until the next storm. Then they become the most important parts on the vehicle for about twenty minutes.
This is one of the best simple car repairs for a first-timer because the payoff is immediate. If your blades streak, chatter, skip, or leave wide unwiped arcs, change them. Most use a hook, pin, or button-style attachment and come off without tools.
Quick replacement habits that prevent damage
Lift the arm carefully and protect the windshield. If the bare metal arm snaps down, it can crack the glass. That is an expensive lesson from a cheap part.
Match the blade lengths exactly. Many vehicles use different sizes on the driver and passenger sides. Once the new blades click in, test them with washer fluid before dropping the arms fully back into place.
Some drivers like beam-style blades because they sit flatter and wipe more uniformly. Others prefer conventional frames for price and easy replacement. Either can work well if the fit is right.
DIY vs pro
Handle this at home if the blades are the only issue.
Ask a shop to inspect it if:
- New blades still skip badly
- One arm moves slower than the other
- The blade does not sit flat on the glass
- You hear grinding from the cowl area
That points to a bent arm, worn linkage, weak motor, or another mechanical issue. Replacing blades will not fix bad wiper geometry.
If you drive a lot in Texas heat, do not wait for full failure. Sun and dust age rubber fast, and poor visibility is not the place to save a few dollars.
6. Tire Pressure and Tread Depth Inspection
You pull into the driveway after a normal week of errands, and one front tire looks a little lower than the rest. That is the right time to check all four, before a small pressure problem turns into uneven wear, poor fuel economy, or a roadside flat.
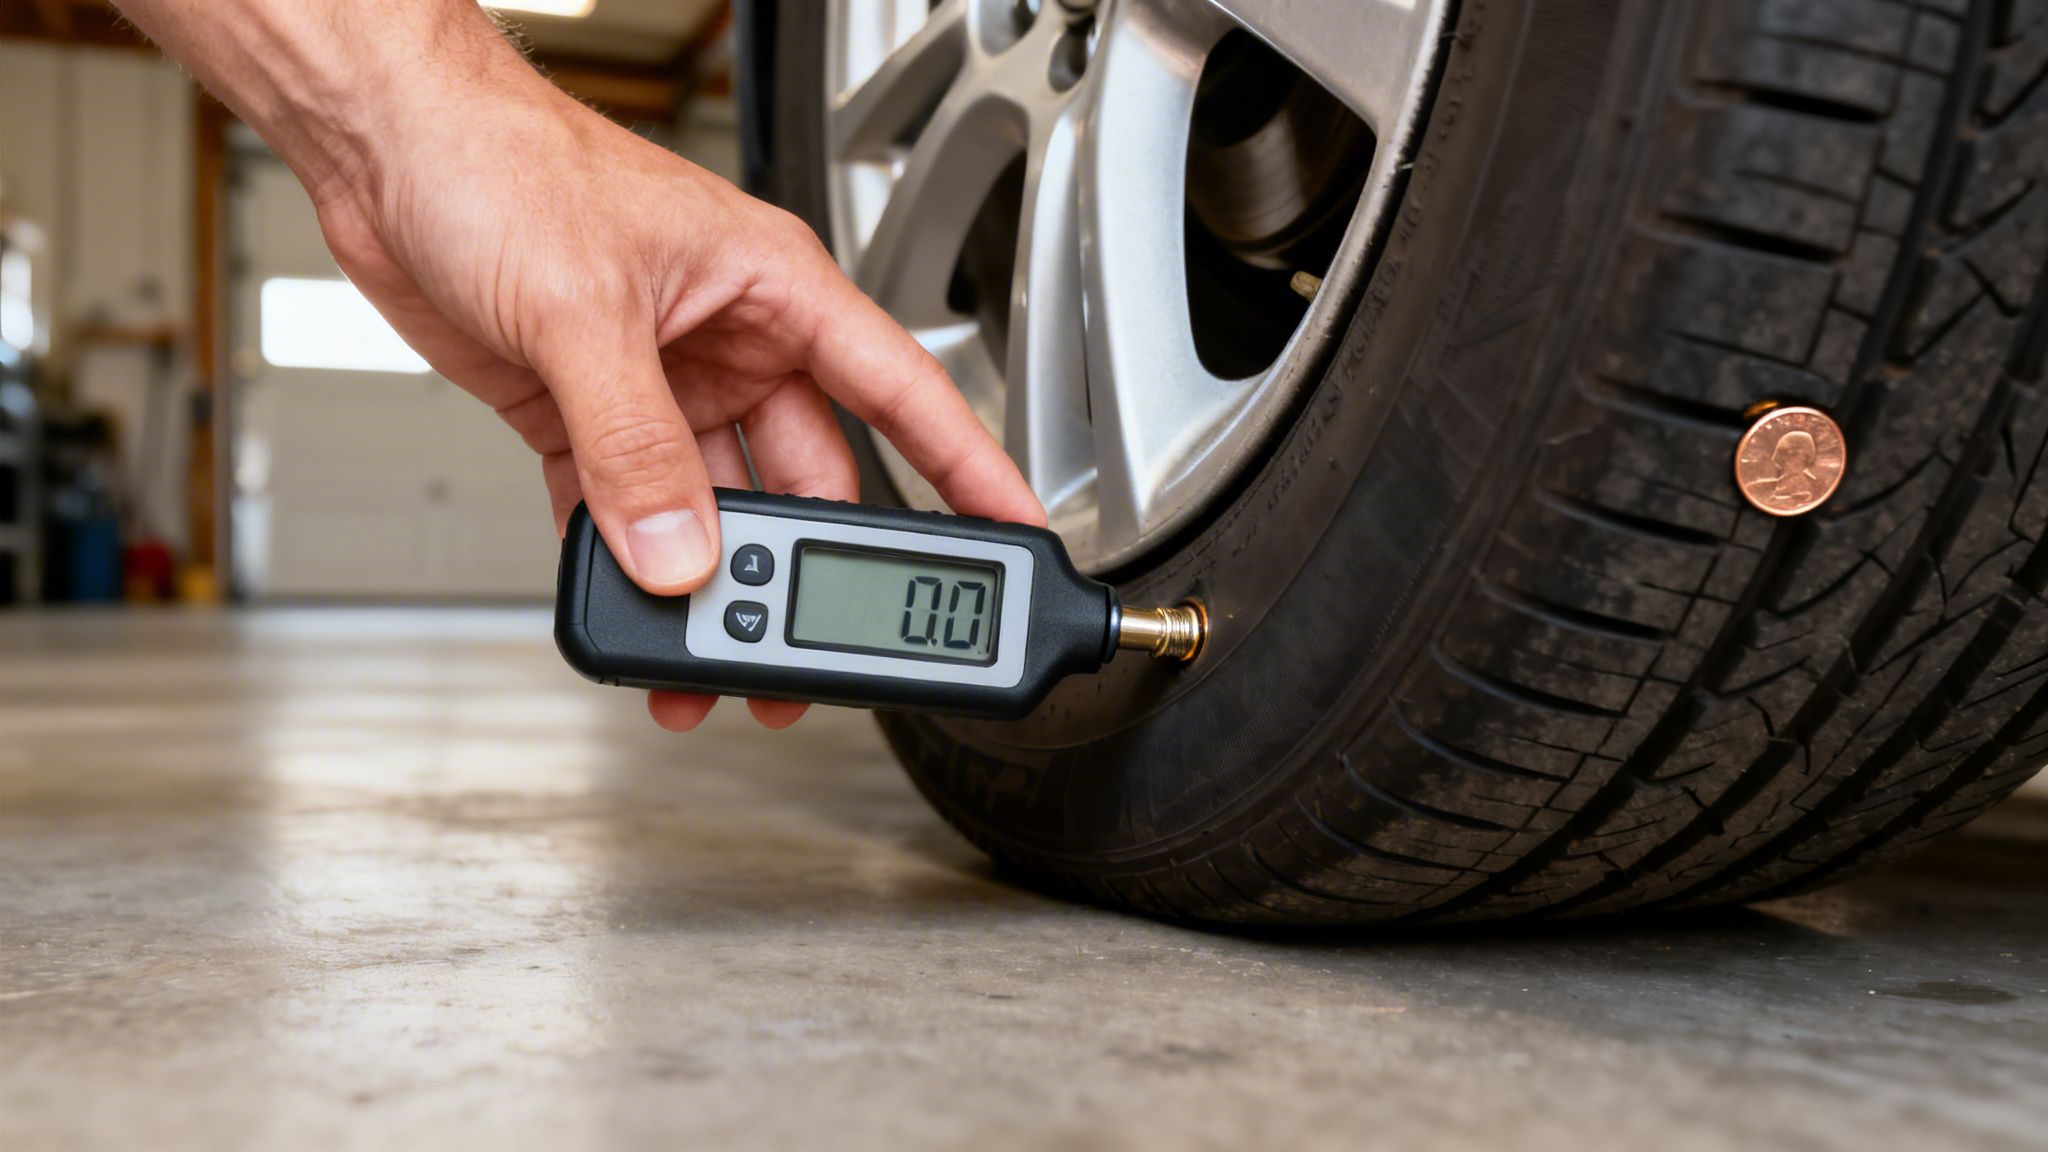
Use a gauge with the tires cold, and fill them to the pressure on the driver’s door jamb sticker. Do not use the maximum PSI printed on the tire sidewall. That number is the tire’s upper limit, not the setting your vehicle needs for normal driving.
Then check tread across the inside, center, and outside of each tire. A penny can give you a rough idea, but a tread depth gauge is better if you want a real answer. I like this inspection because it does more than protect the tire itself. It often gives the first warning that something else on the car is wearing out.
What the wear pattern is telling you
- Center wear: Common with overinflation.
- Both shoulders worn: Often caused by underinflation.
- One edge worn more than the other: Usually points to alignment problems.
- Cupping or scalloping: Often shows worn shocks, struts, or other suspension issues.
Older vehicles especially benefit from regular tire checks. Tread wear often shows a steering, alignment, or suspension problem before the driver feels it clearly from the seat. If you are already watching for rough running or poor acceleration, it also helps to know the common signs of bad spark plugs, since tire wear is not the only thing that can make a car feel off on the road.
DIY vs pro
DIY works well for monthly pressure checks, visual tread inspections, and topping off air.
Book a shop visit if:
- One tire keeps losing pressure
- The vehicle pulls left or right
- The steering wheel sits crooked while driving straight
- You see cords, bulges, or sidewall cracking
- The TPMS light stays on after pressures are corrected
That is the line between simple maintenance and real diagnosis. Checking pressure at home saves money. Persistent air loss, odd wear, or handling changes mean the problem may be in the tire, wheel, alignment, or suspension, and that is shop work.
7. Spark Plug Replacement
Spark plugs sit right on the edge between easy DIY and accidental headache. On a simple four-cylinder with clear access, this can be a satisfying afternoon job. On a cramped engine bay with brittle coils and limited room, it can turn frustrating in a hurry.
Remove and replace one plug at a time. That keeps coils or wires in order and prevents crossed connections. Use a proper spark plug socket, thread the new plug by hand first, and torque it to spec. If it does not thread smoothly, stop. Do not force it.
Read the old plugs before you throw them away
Old plugs tell a story:
- Dry, tan deposits: Usually normal wear.
- Black, sooty tip: Often points to rich running or ignition weakness.
- Oily fouling: Can suggest internal engine wear.
- White blistering: May point to overheating or the wrong heat range.
That is one reason I like this repair for hands-on owners. You are not just swapping parts. You are getting a snapshot of combustion health.
DIY vs pro
DIY works well if access is straightforward and you have the exact replacement plugs, the gap information if needed, and a torque wrench.
Professional diagnostics matter if the engine still misfires after replacement, a coil boot is oil-soaked, a plug well has coolant or oil in it, or a plug seems seized. Broken plugs and damaged threads are not driveway fun.
If you are chasing a hesitation, rough idle, or hard start, these signs of bad spark plugs can help you separate routine wear from a deeper ignition issue.
One more caution. Some repairs look simple online but carry more risk on newer vehicles with electronics and driver-assist systems nearby. Shops should talk more openly about that safety gap since DIY advice often skips the liability side when a repair touches monitored or interconnected systems, as noted in this discussion of when DIY repairs create safety and liability risks.
8. Brake and Power Steering Fluid Checks
Fluid checks are simple. Fluid decisions are not simple.
Brake fluid and power steering fluid both deserve respect because low level is often a clue, not the main problem. Open the hood, wipe dirt away from the caps, and inspect the reservoirs in good light. You are checking level, color, and signs of contamination.
Brake fluid first
Brake fluid should generally look clear to light amber. If it has turned dark, a flush may be due. If the level is low, do not assume you just need more fluid. Brake pads wear down over time, and the level can drop as the caliper pistons extend. A sudden drop, though, can point to a leak, and that is a safety issue.
Never mix brake fluid types unless your manufacturer specifically allows it.
Power steering fluid next
Not every vehicle has hydraulic power steering now, but many still have them. Check the correct reservoir with the engine in the condition the manual specifies. If the fluid is low, top off conservatively with the exact correct fluid. Wrong fluid can cause noise, seal damage, or poor assist.
If you hear whining while turning, see reddish fluid spots, or the steering suddenly feels heavy, stop treating it like a top-off job.
DIY vs pro
DIY is fine for inspection and cautious top-off when the cause is already understood.
A shop should handle it if:
- Brake fluid keeps dropping
- The pedal feels soft
- You see wet brake lines or wheel area leaks
- The steering groans or binds
- Fluid looks contaminated
- A warning light stays on
The service side of the industry is leaning more into digital workflows for these kinds of routine-but-important checks. The global auto repair software market is projected to grow from US$ 3.4 billion in 2026 to US$ 8.6 billion by 2033, with North America holding 38% share in 2025, according to Persistence Market Research on auto repair software. For drivers, that should mean clearer estimates, better inspection notes, and fewer guesswork conversations when a simple fluid concern turns into a repair.
8-Point Comparison: Simple Car Repairs
| Task | 🔄 Implementation Complexity | ⚡ Time & Efficiency | Resources Required | 📊 Expected Outcomes (⭐) | 💡 Ideal Use Cases / Key Advantages |
|---|---|---|---|---|---|
| Oil and Filter Change | 🔄 Low-Moderate (basic steps, safe elevation needed) | ⚡ 20-30 min (experienced DIY) | Wrench, drain pan, filter wrench, jack/jack stands; oil ($20-40 DIY) | ⭐⭐⭐⭐ (removes contaminants, maintains lubrication, prevents wear) | 💡 Routine preventive maintenance; cost-effective DIY; teach vs. professional thresholds |
| Air Filter Replacement | 🔄 Very Low (tool-free on most vehicles) | ⚡ 5-15 min | New filter ($15-40); usually no tools | ⭐⭐⭐ (restores airflow, can improve responsiveness and economy) | 💡 Quick inspection/replacement during oil service; ideal for simple fuel-economy gains |
| Battery Terminal Cleaning | 🔄 Low (basic safety steps and cable handling) | ⚡ 10-20 min | Wire brush, baking soda, wrench, safety glasses (materials <$15) | ⭐⭐⭐ (restores conductivity, reduces starting issues, extends battery life) | 💡 Seasonal/preventive task to avoid no-starts; low-cost immediate impact |
| Coolant Flush and Level Check | 🔄 Moderate (safety critical, cold engine, and disposal concerns) | ⚡ 15-60+ min (level check quick; full flush longer) | Correct coolant, funnel, protective gear; disposal for flush ($20-50) | ⭐⭐⭐⭐ (prevents overheating, corrosion; detects leaks early) | 💡 Essential before hot/cold seasons; DIY for checks, professional for full flushes |
| Windshield Wiper Blade Replacement | 🔄 Very Low (tool-free on most models) | ⚡ 2-5 min | New blades ($15-50 per set) | ⭐⭐⭐ (immediate visibility/safety improvement) | 💡 Fast, low-cost safety upgrade; good for seasonal blade changes |
| Tire Pressure & Tread Depth Inspection | 🔄 Very Low (simple measurements and checks) | ⚡ 10-15 min | Tire gauge ($10-25) or depth gauge; penny test | ⭐⭐⭐⭐ (improves fuel economy, extends tire life, prevents blowouts) | 💡 Monthly safety check and pre-trip inspection; high ROI for fuel and safety |
| Spark Plug Replacement | 🔄 Moderate-High (access and torque critical) | ⚡ 30-90+ min (varies by engine) | Spark plug socket, ratchet, gap tool, new plugs ($80-200 DIY parts) | ⭐⭐⭐⭐ (reduces misfires, improves economy and smoothness) | 💡 Tune-up task for performance/fuel gains; recommend professional if access is limited |
| Brake & Power Steering Fluid Checks | 🔄 Moderate (correct fluid type and contamination assessment) | ⚡ 5-20 min (visual checks); flush longer | Specified fluids ($10-50), clean tools; avoid mixing types | ⭐⭐⭐⭐ (identifies leaks, preserves braking/steering performance) | 💡 Critical safety checks between professional flushes; quick visual monitoring prevents failures |
Know When to Call the Pros at Express Lube
You finish what should have been a simple Saturday job, start the car, and the warning light is still on. Or a quick fluid check turns into a puddle on the driveway. That is the point where saving money means stopping and getting a trained set of eyes on it.
Knowing these eight jobs still pays off. Drivers who can inspect parts, replace basic wear items, and spot early trouble usually catch problems before they turn into overheated engines, dead batteries, or brake issues. You also walk into the shop able to explain what you saw, what you changed, and what happened next. That helps any technician diagnose the problem faster.
The DIY versus pro line is usually pretty clear.
Handle the job yourself if the part is easy to reach, the fix matches the service manual, and the car runs normally afterward. Bring it in if you find a leak, corrosion that will not clean up, stripped threads, a stuck filter, a broken connector, repeated low fluid, uneven tire wear, a persistent misfire, or any warning light that stays on. Brakes, steering, charging problems, and engine temperature issues deserve extra caution because a small mistake there can leave you stranded or create a safety problem on the road.
Cost matters, but timing matters too. A cheap maintenance task only stays cheap if it gets done before related parts start wearing out. AAA makes that point well in its advice on minor car repairs that can save money when handled early. In the shop, I see this most often with neglected coolant, underinflated tires, worn plugs, and fluid leaks that started small and were ignored.
There is also a practical limit to home repair. If a ten-minute job turns into a two-hour fight, if you need more force than the part should require, or if the result does not feel right, stop there. Good DIY work includes knowing when the problem has moved past basic maintenance and into diagnosis.
If you suspect the issue is not routine maintenance at all, contamination is one example, unusual fuel symptoms need immediate attention. This guide on petrol in diesel car symptoms and prevention covers what to watch for.
Need backup from a local shop that keeps things simple and honest? Express Lube & Car Care helps Richland Hills drivers with walk-in oil changes, battery checks, brake service, diagnostics, fluid inspections, and dependable repair advice from ASE-certified technicians. Stop by when a DIY job goes past a simple fix, or come in first and get a straight answer on what you can safely handle at home.