

Your car is dusty from a week of commuting, the lower panels are speckled with road film, and the wheels have that gray-brown layer that plain water never seems to touch. A lot of people roll out the pressure washer, squeeze the trigger, and expect brute force to handle everything.
That usually doesn't end well on a vehicle.
On paint, the best results come from letting soap do the loosening and letting pressure do the rinsing. That's the part many DIY guides skip. They talk about power, but not enough about surface protection, nozzle choice, dwell time, or why a truck door and a concrete driveway should never be washed the same way.
An ASE-certified tech looks at pressure washing a little differently. The goal isn't just to remove grime. The goal is to remove it without etching paint, forcing water into trim, stripping protection, or leaving soap haze behind. If you're trying to learn how to use pressure washer with soap the right way, that's the standard worth following.
Unlock a Deeper Clean With Pressure Washer Soap
A vehicle that looks dusty can still be carrying road film, oily residue, bug remains, and grit packed around trim and emblems. A plain rinse removes the loose stuff. Soap handles the contamination that likes to stay bonded to the surface.
That matters even more on automotive paint.
On cars and trucks, the goal is not to blast dirt off with more force. The safer approach is to let the detergent loosen grime so the rinse can carry it away with less mechanical aggression. That reduces the odds of grinding debris across the clear coat, pushing grime into trim edges, or leaving stubborn film behind on lower panels.
If you have ever finished washing a vehicle and still seen dull patches on the doors or a dirty band along the tailgate, that is usually a chemistry problem, not a pressure problem.
Why soap makes such a big difference on vehicles
Paint, clear coat, plastic trim, rubber seals, wheel finishes, and decals do not all tolerate the same wash method. Vehicles respond best to controlled chemical cleaning first, then a careful rinse. That is the basic difference between pressure washing and soft washing, and it applies directly to safe vehicle care.
In the shop, I treat soap as the step that does the heavy lifting without putting the finish at risk. Good wash soap softens bug residue, traffic film, and oily buildup so you do not have to stand too close with a high-pressure stream. That is one of the easiest ways to get better results at home while protecting paint and exterior plastics.
Soap choice matters too. Household cleaners can strip protection, dry out trim, or leave residue in places you do not want it. If you are tempted to use kitchen soap because it is already in the garage, read this guide on why dish soap is a poor choice for washing a car.
Shop rule: If a vehicle only gets clean when the wand is very close to the paint, stop and fix the wash process first.
Used the right way, pressure washer soap helps you clean faster, rinse more cleanly, and put less stress on the surfaces you are trying to protect.
Choosing Your Soap and Setting Up the Machine
The setup decides whether the wash feels smooth or frustrating. If the machine won't pull detergent, the spray pattern is wrong, or the soap is too thick, people usually blame the pressure washer. Most of the time, the issue is the prep.
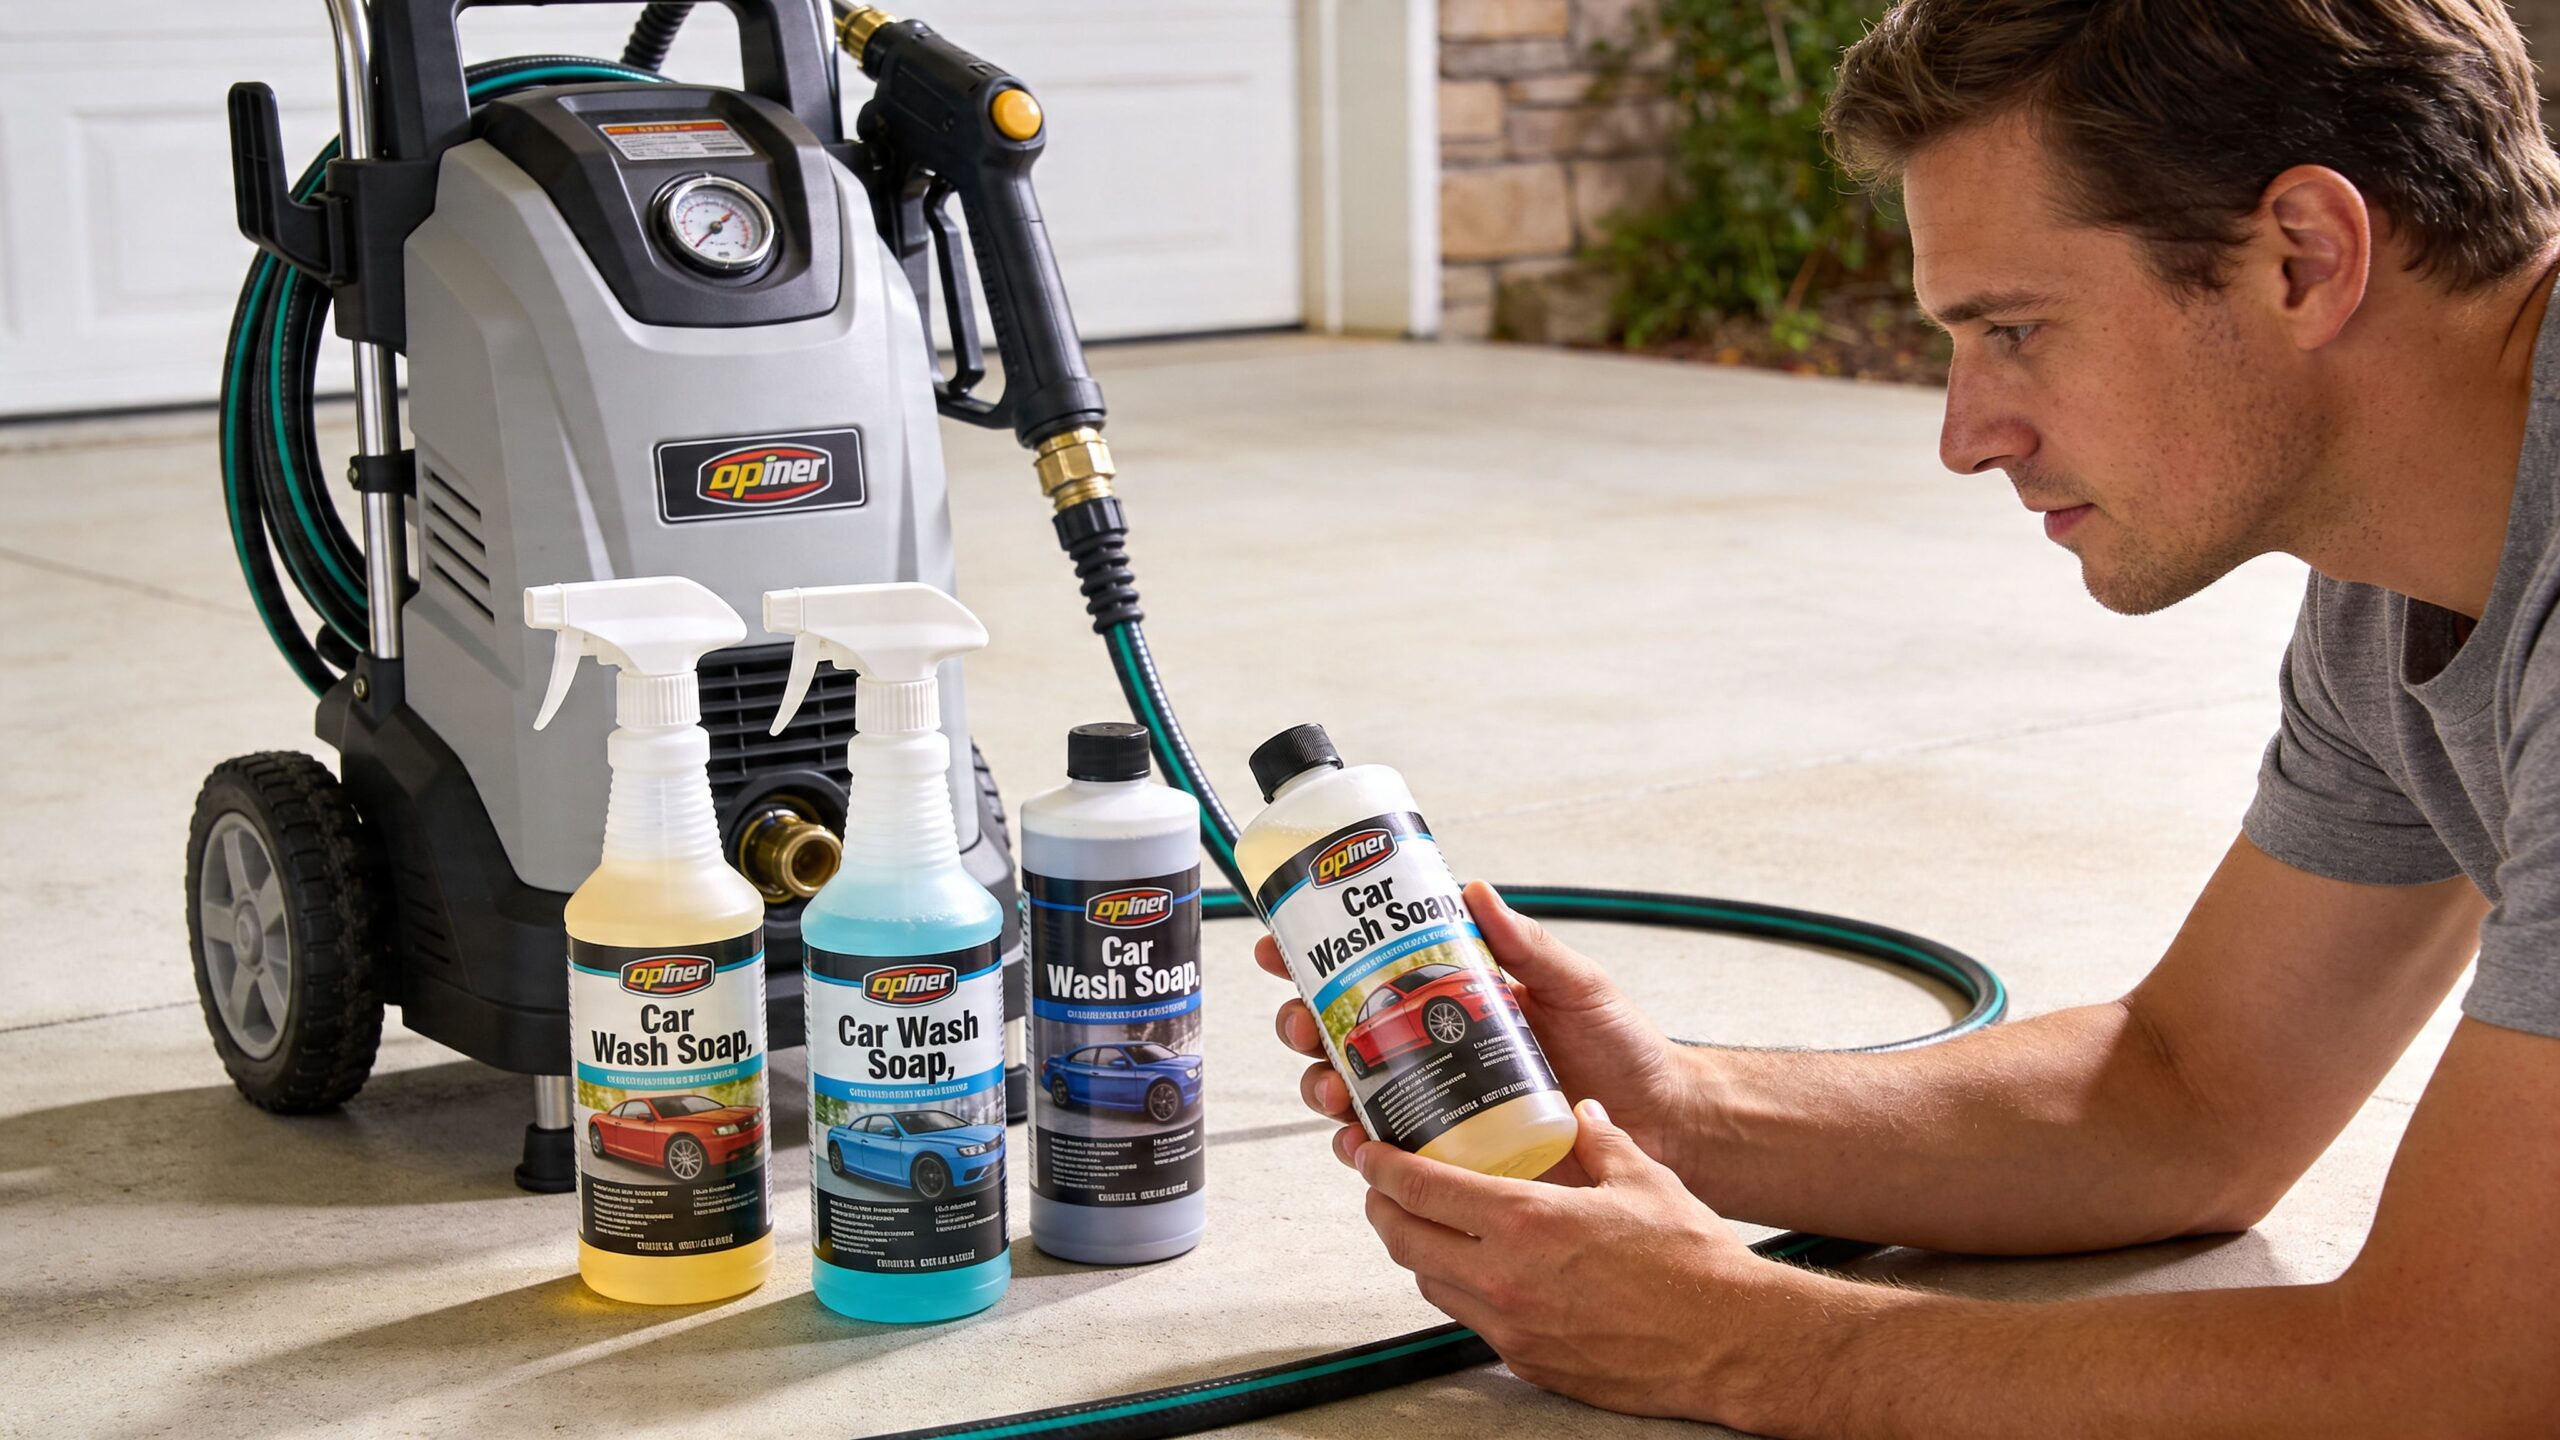
Pick soap made for the machine and the surface
Use a pressure washer-safe detergent that matches the job. For a vehicle, that means a car wash soap formulated to clean paint safely. For concrete or siding, use a cleaner meant for those surfaces.
Skip household shortcuts. Dish soap is a common one, and it's a bad habit for cars and equipment alike. If you're weighing that option, this breakdown on can you use dish soap for car wash explains why it causes problems.
A simple rule works well:
- For cars and trucks: Use a dedicated vehicle wash soap.
- For driveways: Use a concrete or driveway cleaner.
- For mixed outdoor cleaning: Use an all-purpose pressure washer detergent only if the label says it's compatible with your machine and your surface.
Know how the soap system actually works
Pressure washers use one of three common soap delivery setups: integrated tanks, siphon hoses, or foam cannons. Briggs & Stratton explains that these systems draw detergent through low-pressure suction, and that this setup has been standard in 80% of models sold in the US market (Briggs & Stratton cleaning solutions video page).
That point matters because a lot of people expect soap to come through at full pressure. It won't. The machine needs a low-pressure condition to pull detergent into the water stream.
A clean setup sequence
If you want reliable soap flow, follow this order:
- Connect the garden hose first. Make sure the water supply is steady before you start the machine.
- Fill the tank or place the siphon hose into the detergent. Don't overfill a built-in tank.
- Dilute thick detergent if the label calls for it. Briggs & Stratton notes that a 1:10 ratio is typical for thicker detergents.
- Switch the machine to soap mode if your unit has that setting.
- Install the black nozzle. That's what activates low-pressure soap draw on most consumer units.
Two setups you’ll see most often
| Setup | What to do | Common mistake |
|---|---|---|
| Onboard tank | Fill with diluted detergent, engage soap mode, use the black nozzle | Filling with undiluted thick soap |
| Siphon hose | Submerge the hose end in detergent, then trigger until soap starts flowing | Hose not fully seated or left sucking air |
The first time you use a machine each season, give it a few extra seconds to start drawing soap. Air in the line can delay the suds.
A quick visual helps if you're working with a new machine or unfamiliar soap pickup system.
The soap system isn't weak. It's pressure-dependent. If the washer is in the wrong mode or the wrong nozzle is attached, detergent draw stops even though the machine sounds normal.
That one detail solves a lot of "my pressure washer won't pull soap" complaints before they turn into unnecessary part swapping.
Applying Soap for Maximum Effect
A good soap stage buys you cleaning power before you ever touch the paint. On a vehicle, that matters. The more grime you loosen chemically, the less you have to scrub off by hand, and the lower the chance of putting fine wash marks into the finish.
Keep the application controlled and deliberate. Random passes waste soap, leave dry patches, and make it harder to judge what still needs attention.
Build an even coat, panel by panel
Use the soap setup covered earlier and apply detergent one manageable section at a time. On cars and trucks, I prefer to start at the lower body and work upward with steady horizontal passes. That keeps runoff from streaking over dry paint and gives the dirtiest areas, like rocker panels and lower doors, a full coat first.
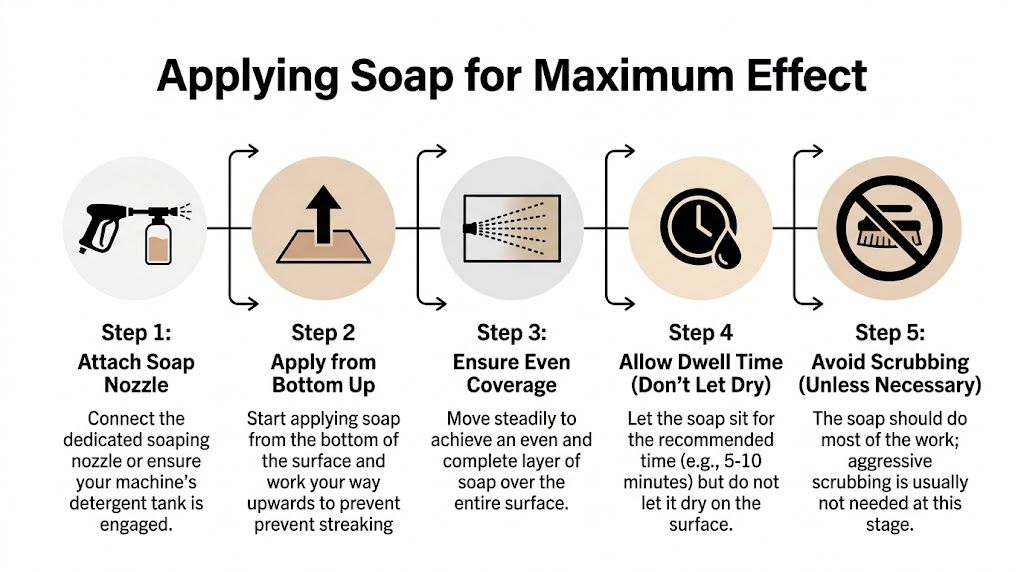
A reliable pattern looks like this:
- Start at the rocker panels, bumpers, and lower doors
- Move upward in slight overlapping passes
- Finish one section before shifting to the next
- Keep the wand far enough back to lay soap on the surface evenly
That last point gets overlooked. If you stand too close, the spray pattern gets narrow and uneven. On automotive paint, that often means patchy coverage and soap running off before it has time to work.
Let the soap work, but keep it wet
Soap needs a short dwell period to soften road film, bugs, and the greasy residue that clings to lower panels. You do not need to rush straight into the rinse. You also cannot let the detergent dry on the surface.
Heat changes the whole job. On a cool panel in the shade, you have more working time. On hot paint, soap can dry fast around mirrors, trim, and body lines, especially on dark vehicles. If the surface feels warm to your hand, wash smaller sections and watch the edges closely. In winter, the opposite problem shows up. Soap and rinse water can start freezing on contact, so if you're washing in cold conditions, use the precautions in this guide to washing a car in freezing weather.
Aim for coverage, not force
During the soap stage, pressure is not the goal. Coverage is.
Hold the wand at an angle that coats the panel without driving detergent into gaps and weak trim edges. That is especially important around:
- Mirror housings
- Window seals
- Badges and emblems
- Fuel doors
- Loose trim or older weatherstripping
I see this mistake a lot on daily drivers with aging seals. The operator gets too aggressive around trim, then wonders why soap sits in the cracks or starts dripping out later.
Agitate only where it helps
A well-maintained vehicle may not need any contact during the soap stage. Heavier bug buildup, traffic film behind the wheels, and greasy residue on lower panels often benefit from light agitation with a clean wash mitt or a dedicated soft brush after the soap has had time to dwell.
Use a gentle touch. Let the detergent do the loosening. The goal is to reduce contact with the paint, not turn the soap stage into a scrub session.
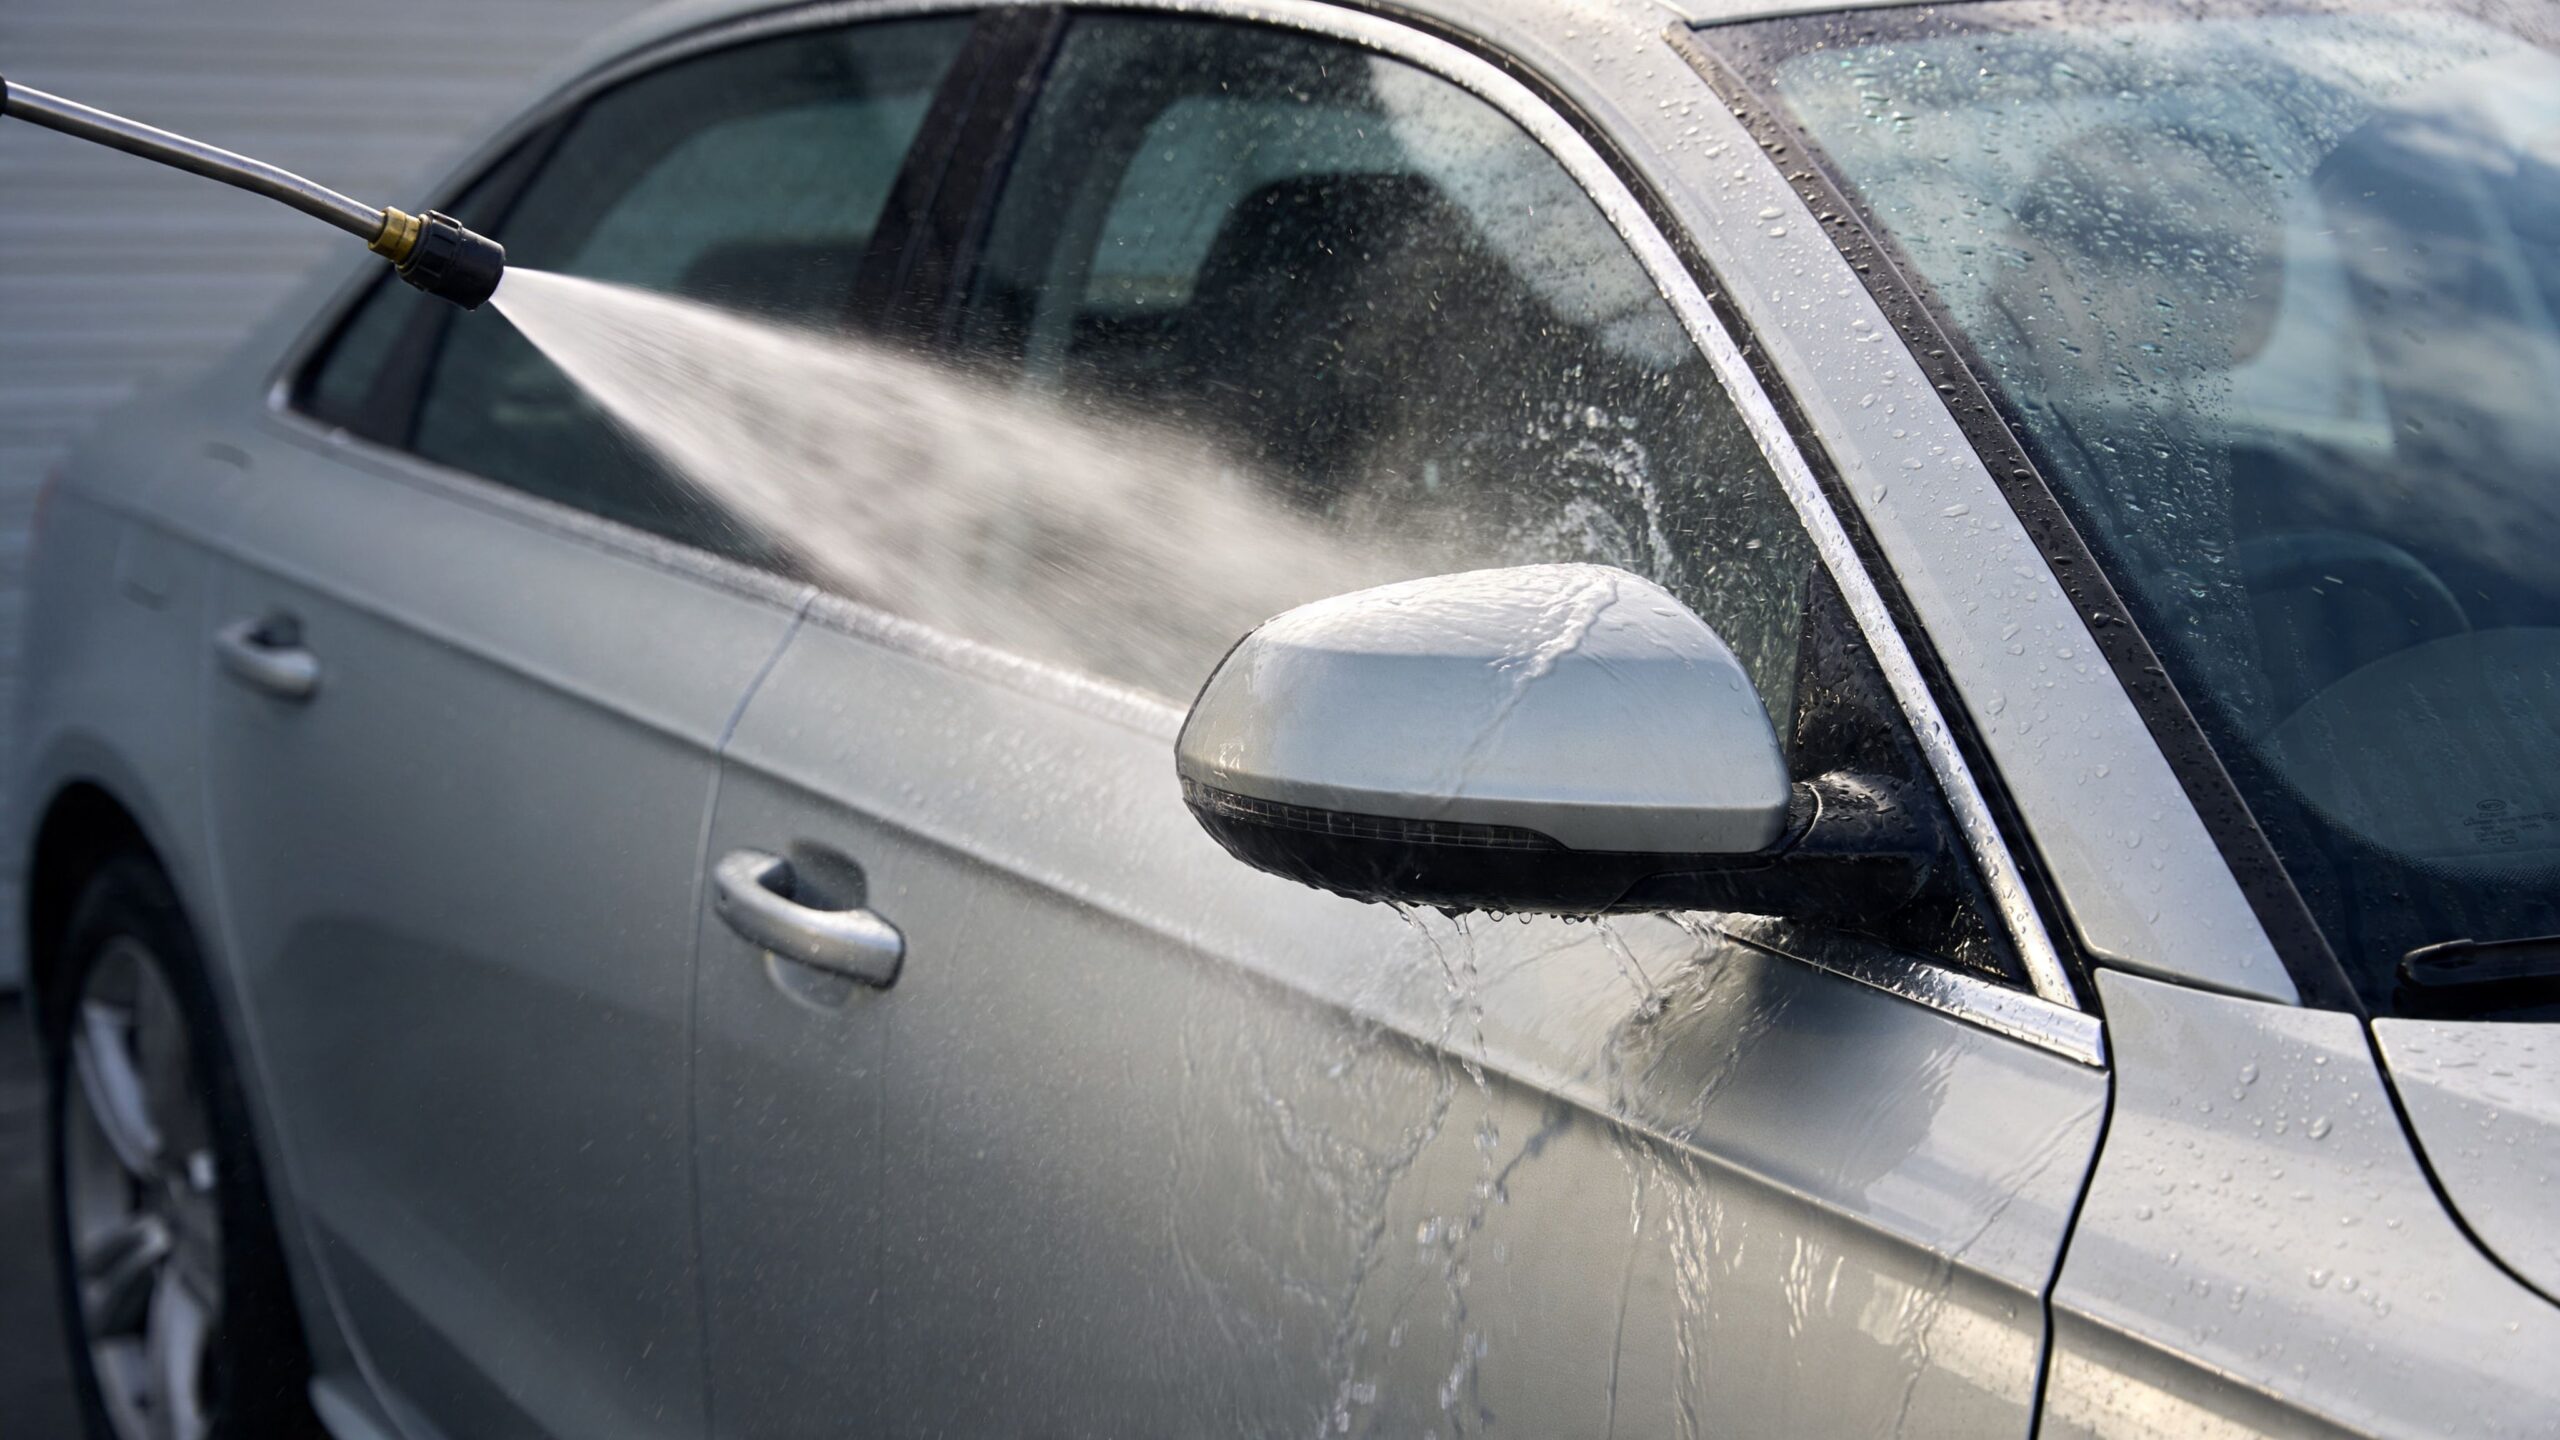
Rinsing for a Spotless Finish
Soap removal is where the finish either looks clean or looks almost clean. "Almost" usually means leftover detergent in seams, around mirrors, under trim edges, or across flat panels where a thin film dried before you noticed it.
For the rinse, switch out of soap mode and change to a rinsing nozzle, commonly a 25-degree green tip or 40-degree white tip depending on your machine and how broad you want the fan pattern.
Reverse the direction and work top down
Soap goes on from the bottom up. Rinse comes off from the top down.
That direction lets gravity help you. You wash suds and loosened grime down the vehicle instead of dragging runoff over a panel you've already cleaned.
A good rinse sequence on a vehicle is:
- Roof and glass first
- Hood and upper body panels
- Doors and quarter panels
- Bumpers, rocker panels, and wheels last
Watch the places that trap soap
The wide panels are easy. The hidden areas are where residue stays behind.
Pay extra attention to:
- Mirror bases
- Door handle pockets
- Window moldings
- Front grille openings
- License plate recesses
- Body seams around the trunk or hatch
Use smooth passes and a controlled angle. You want enough pressure to clear residue, not so much that you're hammering seals and trim.
A spotless rinse is less about force and more about coverage. Miss one seam and the first drip down the door will show you exactly where the soap stayed behind.
If you're washing during a cold snap, timing matters too. This guide on washing your car in freezing weather is worth reviewing before water starts freezing in door seals and jambs.
Finish strong
Once the rinse is complete, inspect the paint from a few angles before the vehicle air-dries. If you see milky trails or flat-looking patches, that's usually leftover soap or a missed area.
Catch it right away. A quick re-rinse is easier than dealing with dried residue later.
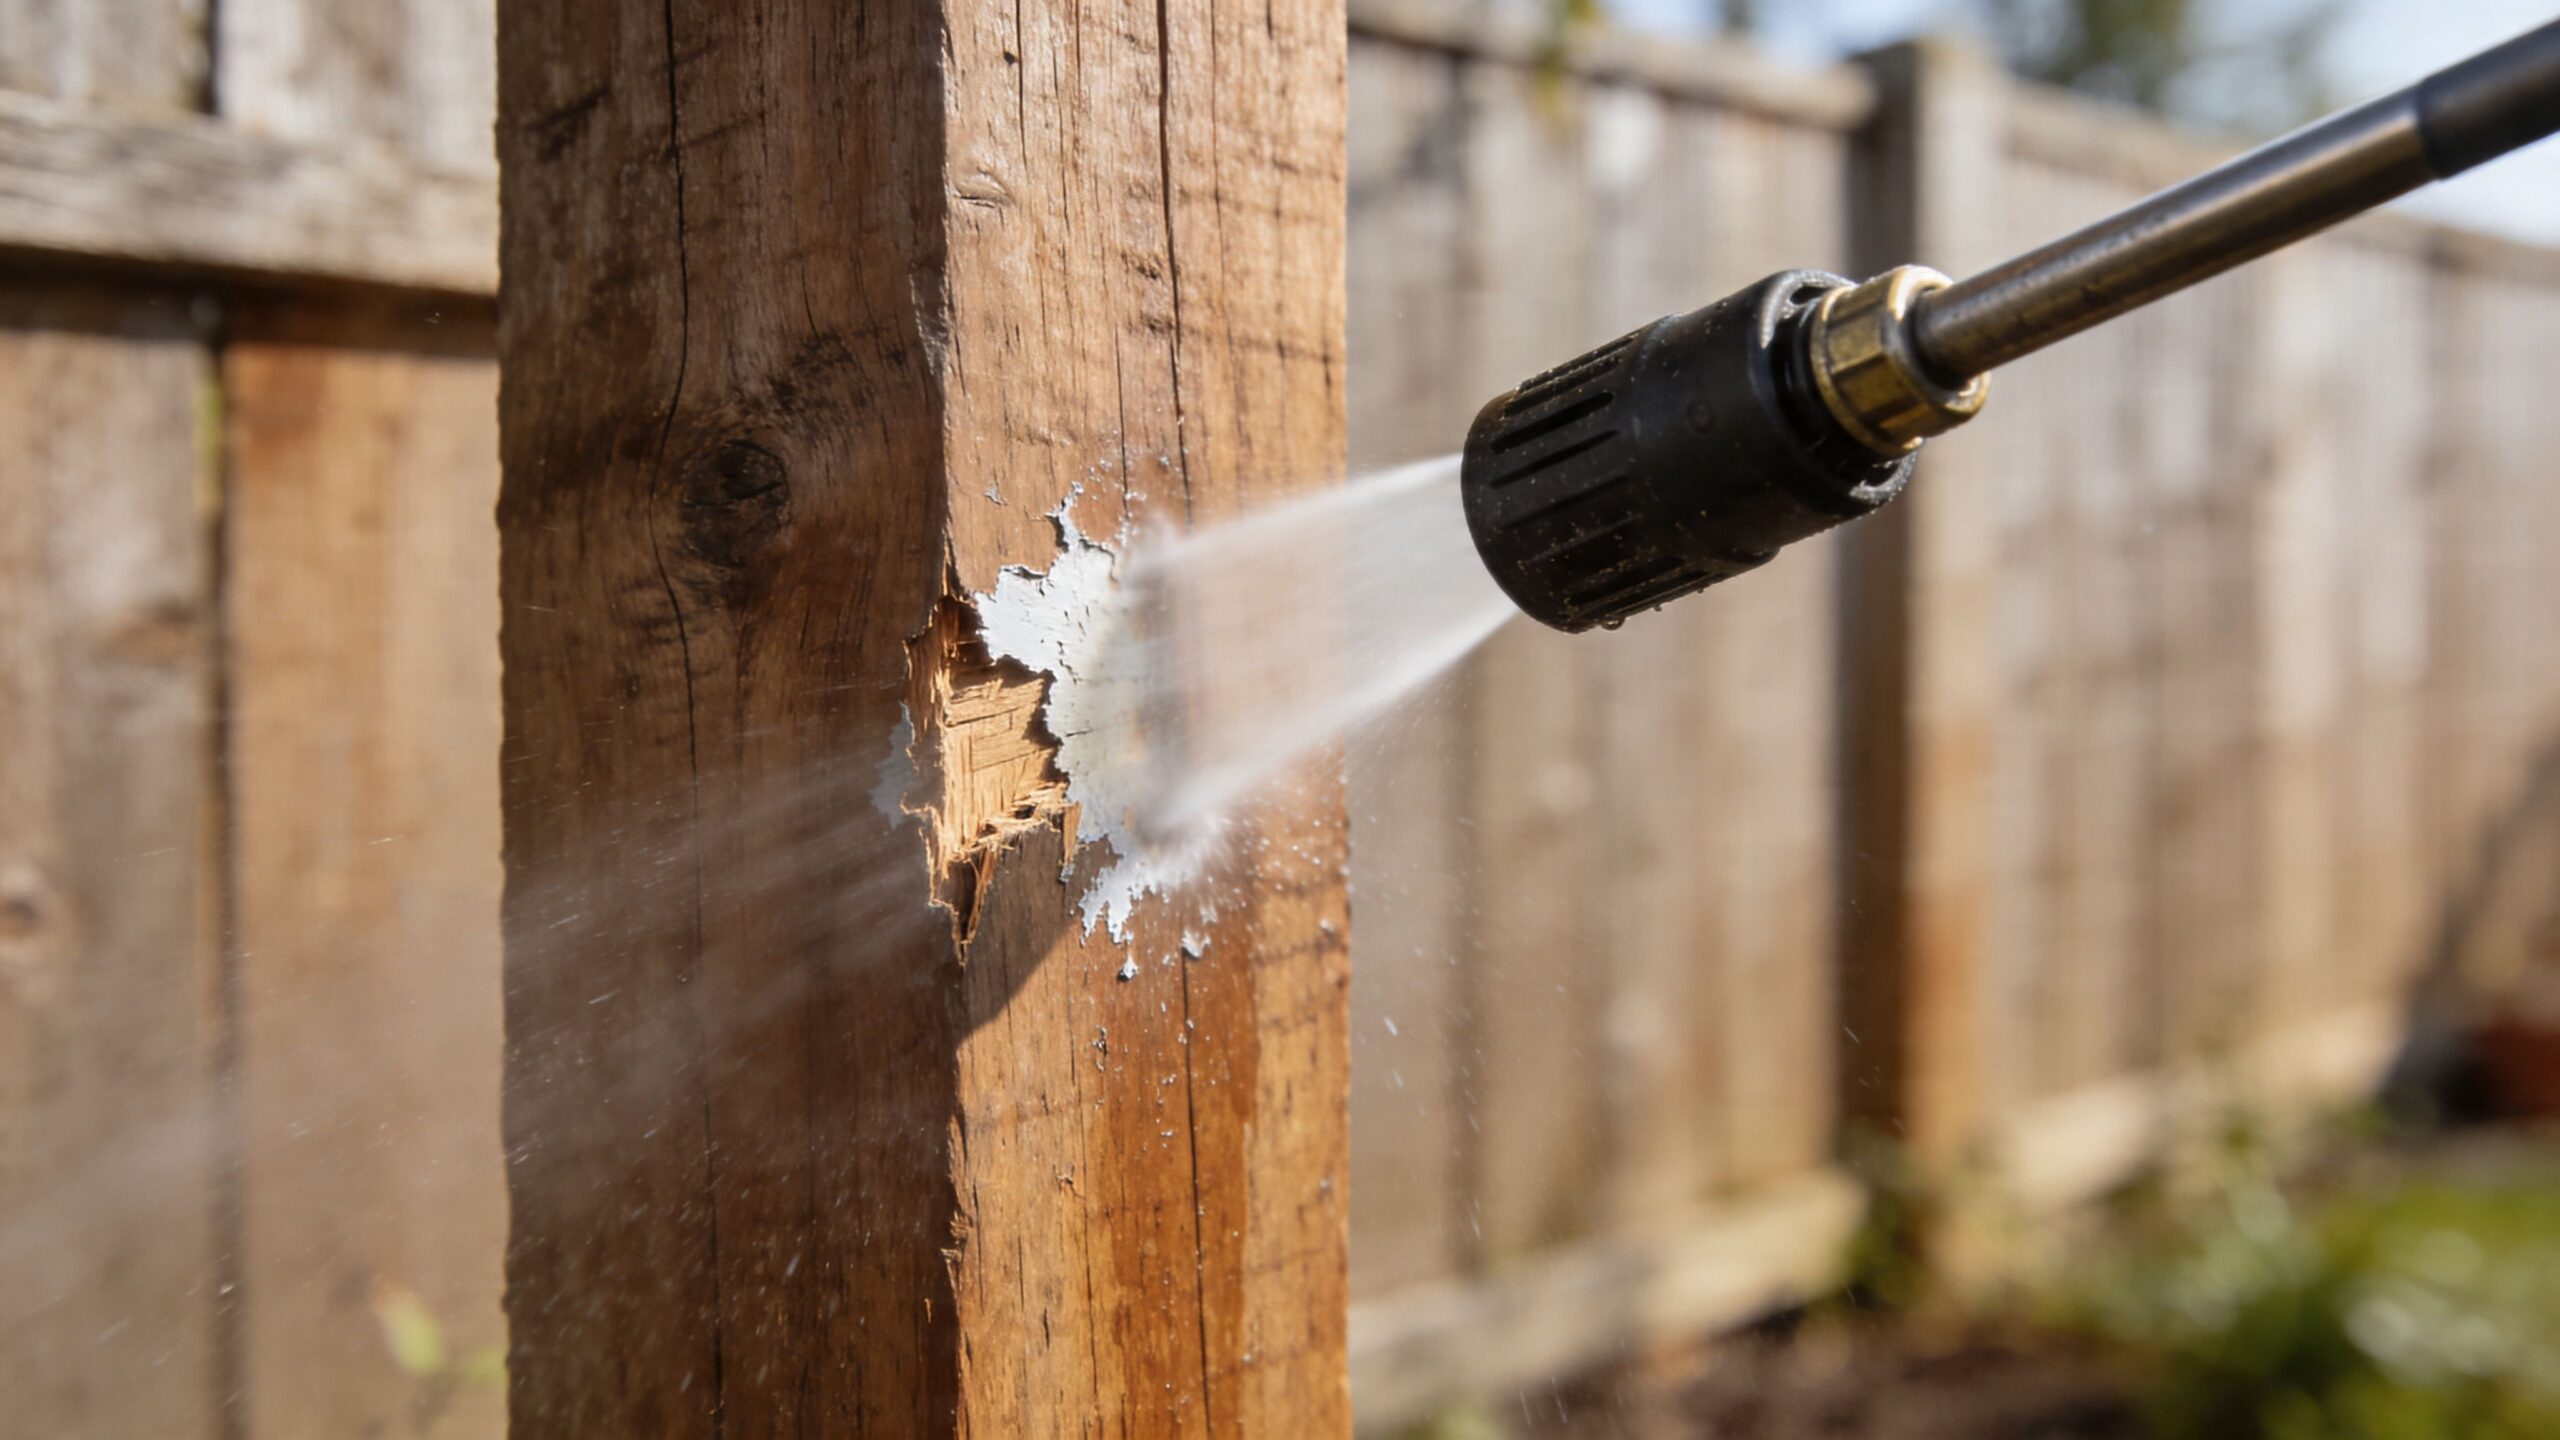
Pressure Washing Mistakes That Can Damage Your Property
Most pressure washer damage doesn't come from a defective machine. It comes from the belief that more pressure always means better cleaning. That's how paint gets marked up, trim gets stressed, and wood gets chewed apart.
Neighbours Windows reports that pressure adjustment and nozzle selection protocols dictate 85% of cleaning success rates, and that mismatches cause 40% of surface damage incidents such as etched paint. The same source notes that using high PSI during the soap phase is a 75% novice error rate, and letting soap dry causes streaks in 65% of cases (Neighbours Windows pressure washer soap article).
Myth and reality on common mistakes
Myth: More pressure will help the soap clean better.
Reality: High pressure during the soap phase usually stops detergent draw and defeats the point of the soap system.
Myth: If a cleaner works in a bucket, it will work in the pressure washer.
Reality: Wrong chemicals can damage internal parts and can be too aggressive for paint, seals, or trim.
Myth: If soap dries, you can just rinse it off later.
Reality: Dried soap often leaves haze, streaking, or spots that take extra work to remove.
Myth: One nozzle setup works for everything.
Reality: A driveway, pickup tailgate, window trim, and painted bumper don't all tolerate the same spray pattern.
The highest-risk habits
Some mistakes show up over and over because they seem efficient in the moment.
- Using the wrong nozzle: Red or narrow high-pressure tips can damage paint, wood, and delicate trim fast.
- Spraying too close: The closer the tip, the more concentrated the force.
- Aiming directly into gaps: Seals, emblems, vents, and trim edges aren't meant to be pressure-fed with water.
- Using harsh cleaners: Bleach and other caustic chemicals create problems for machines and surfaces.
- Working in direct heat without adjusting: A hot panel shortens your safe working time.
Property damage isn't limited to vehicles
The same habits that mark up paint can also damage siding, fencing, and glass. Windows are a good example. People often assume a pressure washer is fine if they stand farther back, but glass, seals, and surrounding trim need a careful approach. If that's on your list, this guide to cleaning windows with a pressure washer safely gives a better framework than guessing.
The wrong setup can still look productive. Dirt flies, water splashes, and the machine sounds powerful. That doesn't mean the surface is being cleaned safely.
Seasonal prep matters too. If you're already thinking about colder weather and general vehicle protection, this article on how to winterize your vehicle is a useful next read.
Your Pressure Washer Soap Questions Answered
You finish the wash, step back, and the car still looks off. Soap streaks on the doors, dry residue around the mirrors, or a detergent tank that never seemed to feed at all. Those problems usually come down to setup, soap choice, or timing, not a bad machine.
From the shop side, I see one pattern more than any other on vehicles. People use enough pressure to move dirt, but not enough care to protect paint, trim, and seals while the soap is working. Good results come from getting the chemical side right first.
Why isn't my pressure washer pulling soap
Start with the basic checks. Make sure the machine is in low-pressure soap mode, the pickup tube is fully seated, and the filter on the end of that tube is clean. If the tube is partly out of the tank or pulling air, soap flow gets weak fast.
The next common issue is viscosity. Thick detergent does not move well through many homeowner siphon systems.
Check these points in order:
- Use the correct nozzle or soap setting: Many machines only draw soap in low pressure.
- Keep the pickup tube submerged: Even a small air leak can stop detergent draw.
- Clean the siphon filter: Dried soap residue can restrict flow.
- Test with plain water first: If the system will not pull water, the problem is in the feed setup, not the soap.
- Warm and dilute thick soap if the label allows it: Cold, gel-like detergent often feeds poorly.
If the unit sat for a while after the last wash, dried detergent in the injector is a strong suspect.
Do I need to dilute pressure washer soap
Often, yes. Follow the product label first, because some soaps are ready to use and others are concentrates meant to be mixed before they ever hit the tank.
For vehicle washing, proper dilution matters for two reasons. The machine has to draw it consistently, and the soap has to rinse clean without leaving film on paint or glass. Too strong, and you can end up chasing residue. Too weak, and you waste time on a second pass.
Can I use regular car wash soap
Sometimes, but only if the label says it works through a pressure washer or foam cannon system. Bucket wash soap can be excellent by hand and still perform poorly through a detergent injector.
On cars, I recommend sticking with a pH-balanced product made for automotive finishes. Household cleaners and heavy degreasers can strip wax, dry out trim, and stain sensitive surfaces. That trade-off is not worth it for routine washing.
How long should I let soap sit on the car
Usually a short dwell is enough. Give it time to loosen traffic film and bug residue, then rinse before it starts drying.
A cool panel gives you more margin. A hot hood or black paint in direct sun gives you very little. In those conditions, work one section at a time and keep the soap wet. That is how you avoid spotting and streaking.
Do I need to scrub after applying soap
Lightly dirty paint often does not need much agitation. Soap and rinse pressure can remove a surprising amount if the surface is maintained well.
Road film, bug buildup, and lower-panel grime are different. Use a clean wash mitt or a soft detailing brush where needed, with light pressure and plenty of lubrication from the soap. On paint, every unnecessary swipe is a chance to drag grit across the finish.
Should I clean out the soap system after I'm done
Yes. Flush the detergent line with clean water for a minute or two after washing. That simple step helps prevent clogs, sticky valves, and weak soap draw the next time you pull the machine out.
It also protects the machine from a problem that shows up later, right when you are ready to wash.
If a pressure washer suddenly stops pulling soap after sitting in the garage, leftover detergent in the pickup tube, injector, or filter is one of the first places to look.
If you'd rather leave the grime, maintenance, and vehicle protection to a local team, Express Lube & Car Care in Richland Hills offers fast, dependable service from ASE-certified technicians. Whether you need routine maintenance, help protecting your vehicle between seasons, or a trusted shop to keep your commuter or fleet running right, you'll get straightforward recommendations and walk-in convenience without the runaround.